Showing posts with label cooking. Show all posts

Monday, February 10, 2025

Easy 3 Ingredient Basic Sourdough Bread

Basic Sourdough Loaf

I've toyed with sourdough over the years. Admittedly, I've killed a few starters. Fortunately, it's easy to make a new sourdough starter if you find you've neglected one too long or contaminated it. You can find simple instructions HERE.  Or better yet, find a friend who will share her starter.

My current starter is six years old and going strong. I don't feed it daily. I don't measure or weigh the flour and water accurately when I do feed it. It has been ignored for weeks at a time, and it is still a healthy starter. I just don't stress over it, and it rewards me every time I use it.

So, with that pep talk out of the way, here is a recipe for a basic sourdough loaf. I'll share ways to embellish it with sweets or savories later.

Basic Sourdough Bread


1/4 C Active Sourdough Starter (the gurus say to feed your starter 24-48 hours prior to using, but I kind of fly by the seat of my pants. I usually feed mine 2-3 hours before using and guess what? It works just fine.)
1 1/2 C warm water (95 - 100 degrees. It doesn't need to be filtered, and you don't need a thermometer. Just don't get your water so hot that you kill the starter.)
4 1/4 C flour (I don't have the room or the patience to store all-purpose flour AND bread flour, so I just use all-purpose flour.)
1 1/2 tsp salt

Four simple ingredients. That's it!

I always begin with my starter at room temperature. If it has recently been fed, I use it as soon as it warms up. If not, I feed it with equal parts flour and warm water. As soon as it's nice and bubbly and has increased in volume, it's ready to use. This usually takes a couple hours or so depending on the temperature of your kitchen, weather, etc.

Stir down your bubbly starter before beginning the dough.

In a large plastic, glass, or ceramic bowl, dissolve the 1/4 C starter in 1 1/2 C warm water.

Guess what? You can use more starter if you desire, or if like me, you've fed it too generously and it's growing out of its container!

When the starter is dissolved, stir in the salt and then add the flour. I add about half and combine with a rubber or wooden spoon. Then continue to add the remaining flour. You'll want to finish combining the dough with your hands to get it all incorporated. Dampen your hands slightly to avoid sticking.

Work the dough just until it begins to appear smooth. Cover the bowl with a damp cloth (don't let the cloth rest on your dough) and place in a warm location. When it's wintery weather, I use my oven. Warm it slightly and turn it off before placing the dough inside. Let it sit (proof) for 30 minutes - or an hour, or until you remember you are making bread!

Remove the dough and work it a bit more. This is where a rubber spoon or scraper comes in handy to remove ALL the dough from the bowl. If you are adding savory ingredients, you can do it now. I like to add the sweet things right before the last proofing. On a floured surface, stretch the dough a few inches and fold the stretched piece over itself, working in the savory goodies. Do this about 4-5 times. 

Shape the dough into a round loaf and return it to the bowl, covering with a damp cloth. Allow to proof for several hours. Overnight is easiest. You can mix your dough a couple hours before bedtime and do the last shaping in the morning. If you plan ahead, you can complete a loaf in one day, but you'll want to get it mixed up early in the day by feeding the starter or setting it out the night before so it's ready to go.

After your loaf has proofed for several (6 -10) hours remove it gently from the bowl and allow it to rest for 5-10 minutes. If you are adding sweet ingredients like cinnamon, sugar, or dried fruit, do it now. Using the stretching and folding technique, work the dough one last time, folding in added ingredients. 

Shape the dough into a nice round loaf. Coat a cloth large enough to cover the inside of the bowl with a light layer of flour - a woven dish towel works well. Line the bowl with floured side up. Place the loaf back into the bowl. Cover with a damp cloth and allow it to proof 1 hour.

After one hour, heat your oven to 435 degrees. 

Remove the damp cloth and use parchment paper to cover your dough bowl. Gently invert the bowl so the loaf drops onto the parchment paper. This might take some practice. Don't panic!

Using a serrated knife (unless you are fancy and have all the latest sourdough gadgets) score your dough
Score and place in dutch oven
as desired. The easiest and probably my favorite is a crisscross cut about 1/2 inch deep in the top. Make the cuts about 5-6 inches long.

Lift the loaf using the parchment as a liner and place in a cast iron or ceramic Dutch oven. I prefer ceramic. Cover and bake for 30 minutes. Reduce heat to 400 degrees, remove lid and bake for approximately 30 minutes more. Temperatures and times will vary depending on elevation, dough density, and humidity. Keep an eye on it and allow yourself a learning curve. After all, you're only out some flour and salt! 

This is the hardest part - when the dough is finished, allow it to cool completely before slicing. I know! It's a challenge, but slicing it while warm, though tempting, can make that fluffy loaf fall. 

If you are a better planner than I am, and pull it from the oven just before dinner, go ahead and eat it warm!

Now that you have perfected your basic sourdough loaf, you can begin to create sweet and savory loaves like Cheesy Garlic Bread and Cinnamon Craisin Bread. I'll share tips for these in a future post.

Good luck in your quest and please, come back and let me know how your bread skills are coming along.

Find more of my favorite recipes HERE.


Question: Do you have a recipe to share?  Comment below.

Running Granny Green encourages women, especially grandmothers, to gain greater fitness by providing tips and inspiration to insure long years of joyful grand-parenting. The cookie recipes are a bonus!


Happy Running!
- Carol aka Running Granny Green

Follow me on Facebook and Instagram!

Tuesday, February 4, 2025

Meatloaf with BBQ basting sauce and Garlic Smashed Potatoes


We were never meatloaf fans (the food, not the singer) until our youngest son found a recipe that he wanted me to try. I was skeptical, but after a few tweaks, this one is a keeper. I think it's all about this sauce that keeps it moist and flavorful. I usually try to set some aside for later use before it contacts the meat. Pair it with Garlic Smashed Potatoes and glazed carrots. Your tummy and tastebuds will thank you!

The leftovers are great for meatball sandwiches.

Brock’s Meatloaf                                                                            

1 - 1 ½ Lbs Ground Beef

1 C Breadcrumbs

¾ Onion, diced

1 Egg, slightly beaten

1 ½ tsp Salt

½ tsp Pepper

2 8-oz. Cans Tomato Sauce

3 Tbsp Vinegar

3 Tbsp Brown Sugar

2 Tbsp Dijon Mustard
2 Tbsp Worcestershire Sauce


Preheat the oven to 350 degrees. Mix together beef, breadcrumbs, onion, egg, salt, pepper, and ½ Cup of tomato sauce. Form the meat mixture into a loaf and place in a shallow pan. Stir together the remaining tomato sauce, vinegar, sugar, mustard, Worcestershire sauce, and water as needed to thin the sauce. Pour the sauce over the meatloaf. Save excess sauce for garnishing baked meatloaf. Bake for 1 hour, basting every 15 minutes with juices from the pan.

Serve with garlic mashed potatoes.


Garlic Smashed Potatoes


Yes, we call them smashed potatoes, cuz that’s what you do to mash them - you smash ‘em!

These pair well with any meat dish when you want to get a little fancy or don’t want to make gravy.

We like them with meatloaf, salmon, and pork chops. You might get a sidelong look when you serve

them up without sauce, but your guests will soon get over it. 


3-4 Potatoes (Russets or Reds will work just fine)
1-2 tsp Minced Garlic

Water and Chicken Bouillon or Chicken Broth

2-4 Tbsp Butter

Several Tbsp of Sour Cream

Garlic Powder (if needed)

Salt to Taste

Herbs for Garnish


Peel and quarter potatoes. Add enough chicken broth or water and bouillon to cover.

Add minced garlic and salt as desired. Bring to a boil and cook until tender. Drain, reserving

liquid to add later if needed for consistency. Smash those spuds! Use a vegetable masher,

electric mixer, or ricer to mash potatoes until smooth. Add butter and sour cream.

Stir or beat until smooth. Add reserved liquid until desired consistency is achieved.

You will want to be able to drop potatoes from a serving spoon. If more garlic flavor is desired,

use garlic powder as needed.

Garnish with butter and chives or parsley.


Find more of my favorite recipes HERE.


Question: Do you have a recipe to share?  Comment below.

Running Granny Green encourages women, especially grandmothers, to gain greater fitness by providing tips and inspiration to insure long years of joyful grand-parenting. The cookie recipes are a bonus!


Happy Running!
- Carol aka Running Granny Green

Follow me on Facebook and Instagram!

Tuesday, January 28, 2025

Pork Sausage Egg Rolls with Sweet and Sour Sauce

Montanans know how to prepare beef, and they do it well. However, good ethnic food is hard to find. Idaho's Treasure Valley is rich with culinary variety, and perhaps I was a bit spoiled, but I often tell people, "The best Chinese (or Mexican) food in Montana is in my kitchen." Enjoy another of my favorite dishes with this make it yourself egg roll recipe.

Pork Sausage Egg Rolls

1 lb. Pork Sausage

1 C Shredded Cabbage

1 C Shredded Carrots

¼ - ½ C Dice Onions 

Dash each of Garlic Powder, Cayenne, and Ginger

Salt and Pepper to taste

Egg Roll Wrappers - 1 - 2 packages.


Brown sausage over medium heat in a large skillet. Break it up with a nylon meat chopper or potato masher while cooking. Add spices and vegetables and cook until tender. Cool slightly.


Assemble egg rolls following instructions on the package. Fill with a spoonful of the sausage mixture and tightly wrap like a burrito. (See package) Dampen the last corner and press firmly to seal the roll. If preferred, double wrap to avoid spilling of filling. There may be a learning curve here!


Fry in hot oil until golden brown. Serve with Mandarin Sauce, sweet and sour sauce (recipe below), or hot mustard.


Hint: Egg Rolls can be made ahead and refrigerated or frozen. Leftover filling can be frozen for future use. Leftover wrappers can be filled with cream cheese, jam, pie filling - the options are endless!


Julie’s Sweet and Sour Sauce


This is the easiest sweet and sour sauce recipe ever! Julie is a dear friend who learned Chinese cooking as a teen from friends who owned a restaurant, so this recipe is a winner!


1 ¼ C Cold Water

1 C Sugar

¼ C White Vinegar

3 Tbsp Cornstarch

Red and Yellow Food Coloring


Combine ingredients and cook until thick, stirring constantly. Remove from heat. Add a few drops of food coloring to achieve the desired hue. Makes enough sauce for 4. Can easily be doubled or tripled as needed.


Find more of my favorite recipes HERE.


Question: Do you have a recipe to share?  Comment below.

Running Granny Green encourages women, especially grandmothers, to gain greater fitness by providing tips and inspiration to insure long years of joyful grand-parenting. The cookie recipes are a bonus!


Happy Running!
- Carol aka Running Granny Green

Follow me on Facebook and Instagram!


Monday, January 27, 2025

10 Reasons I'm Publishing a Cookbook

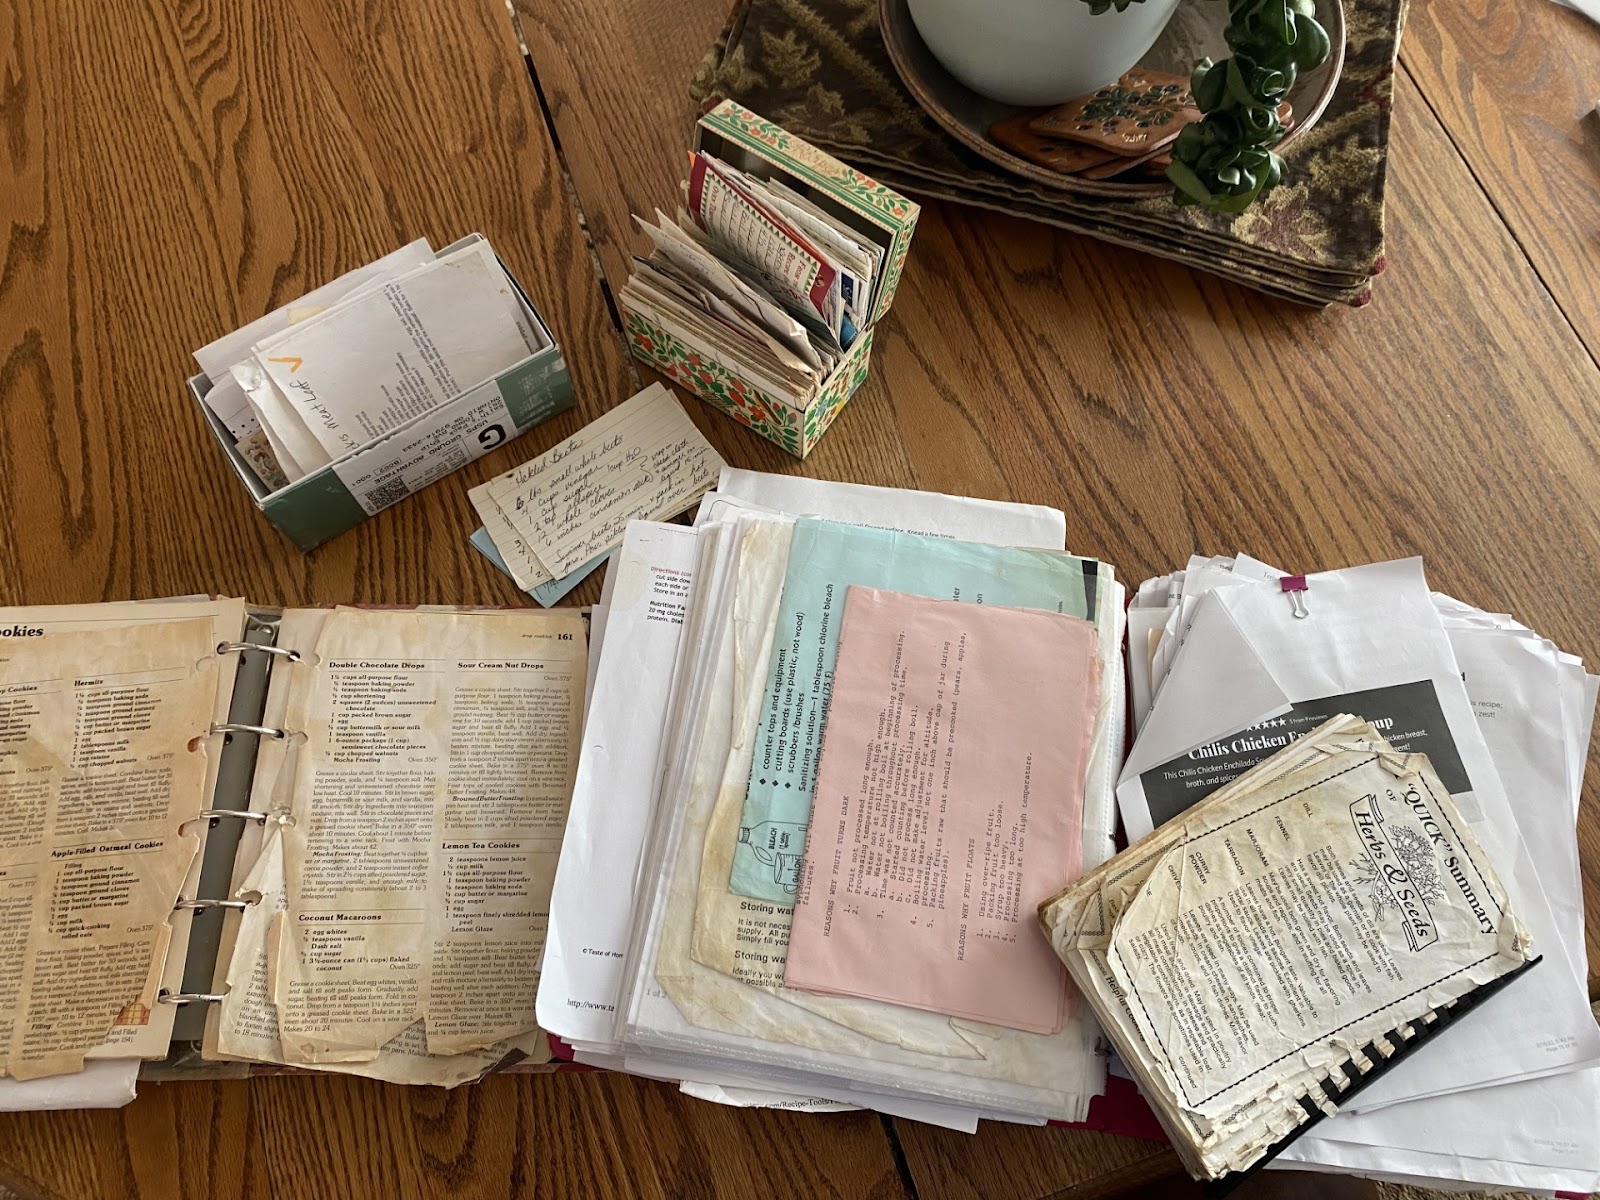
Embarrassing reveal of only some of my recipes!

I recently determined to publish a cookbook. I asked for feedback from friends, but I think I had made the decision to forge ahead even before their much-appreciated input. 
It's proving to be a big task!


Here are ten reasons behind my motivation.


1 - My recipe books and scattered recipes are overtaking my storage space.


2 - I visualize each recipe - I know if it is typed or handwritten, in a book or file box, online somewhere, or shoved in a drawer. I waste a lot of time searching for the recipe I can "see" in my head.


3 - As you can see by the photo above, some recipes are becoming faded, stained, or torn and will need to be reproduced anyway.


4 - I have cookbooks that take up space yet have only a handful of useful (at least for me) recipes inside.


5 - Friends and family often ask how to make a particular dish and I have to go in search, take a photo or send a long text of instructions when it would be beneficial to direct them to a digital version or hard copy of all my favorite dishes.


6 - I needed a project to get me through January and February.


7- A few of the recipes on this blog required an update.


8- I can kill two birds with one stone if I update and create at the same time.


9- It gives me an excuse to cook some things I haven't enjoyed making in some time.


10 - While the task is truly for my own sanity and organization, the cookbook will be available for purchase as an eBook or hard copy. So maybe that is a third bird with the same stone.


Can you guess which of my recipes is most requested?
The answer is here.


Running Granny Green encourages women, especially grandmothers, to gain greater fitness by providing tips and inspiration to insure long years of joyful grand-parenting. The cookie recipes are a bonus!


Happy Running!
- Carol aka Running Granny Green

Follow me on Facebook and Instagram!

Tuesday, January 21, 2025

Cranberry Scones with Lemon Glaze

Cranberry Scones with Lemon Drizzle

Cranberry Scones with Lemon Glaze

These scones are a hit with family and friends. One recipe makes 18 scones, so you have plenty to set out for breakfast on the go. I tried them with fresh blueberries and my husband asked, “Why are the scones green?” I think I’ll stick with the dried cranberries.


1 C Sour Cream

1 tsp Baking Soda

4 C Flour

1 C White Sugar

2 tsp Baking Powder

1 tsp Salt

1 C Butter (chilled)

1 Egg

1 C Dried Cranberries


Preheat the oven to 350 degrees. Prepare lightly greased cookie sheets or use silicone baking mats on the pans. 


Mix sour cream and soda in a glass container large enough for it to expand. Set aside. It will start to bubble.


Whisk together flour, sugar, baking powder, and salt. Grate cold butter into the dry ingredients or cut in with a pastry fork. 


Beat the egg and add to the sour cream mixture. Blend gently. Add to dry ingredients and mix gently with an electric mixer or work it in with your hands. Dough should be fairly dry. Add dried cranberries and mix until just combined.


Divide dough into three equal parts and form into 1-inch-thick circles. Cut each circle into six equal parts. 


Bake for 15-20 minutes until just beginning to brown on tops. (I’m at 3800 feet and bake mine for 18 minutes.) Let cool.


Lemon Glaze

Cranberry scones with lemon glaze

Lemon Juice or Lemon Extract

Powdered Sugar

Milk


Mix together milk and powdered sugar to desired consistency. Add lemon juice or lemon extract to flavor. I prefer lemon juice. After adding the juice, you may want to add more sugar for consistency. I like to glaze my scones while they are still a little warm by spreading the glaze over the entire scone with a pastry brush. For a fancier look, wait until scones are cooled and then drizzle glaze in a diagonal direction. 


Store in an airtight container or freeze in a zippered bag. Pull them out for breakfast and your guests will be fighting for the last scone!


Find more of my favorite recipes HERE.


Question: Do you have a recipe to share?  Comment below.

Running Granny Green encourages women, especially grandmothers, to gain greater fitness by providing tips and inspiration to insure long years of joyful grand-parenting. The cookie recipes are a bonus!


Happy Running!
- Carol aka Running Granny Green

Follow me on Facebook and Instagram!

Monday, January 20, 2025

Quick and easy Chicken Pot Pie with Biscuit Crust


Individual Chicken or Turkey Pot Pies


 Chicken or Turkey Pot Pie w/ Biscuit Crust

As empty nesters, we end up with a lot of leftovers even from one roasted chicken. If you find yourself with a little extra chicken and gravy, here’s a quick and tasty way to assemble individual pot pies.


1/4 C Chopped Onion

1/2 C Chopped Carrots
1/2 C Chopped Celery

1 C Cubed Potatoes (Can be previously cooked as in leftovers from the roasted chicken dinner)

Chicken Bouillon

Leftover Chicken Gravy

1/4 C Frozen Peas

1/2 C Frozen or Canned Corn

1 C Cubed Chicken or Turkey 

Salt & Pepper to taste.


Boil raw vegetables in just enough water to cover. Add bouillon to taste. When vegetables are tender, add leftover gravy, peas, corn, and cubed meat. Cook until heated through. Season to taste. Note: If a thicker gravy sauce is desired, thicken with a flour and water mixture and cook until desired consistency.


Meanwhile, prepare biscuit crust. I like this Baking Powder Biscuit recipe.


Baking Powder Biscuits


2 C Flour

1 Tbsp Baking Powder

2 tsp Sugar

½ tsp Cream of Tartar

¼ tsp Salt

½ Cup Shortening

⅔ C Cold Milk


Preheat the oven to 425-450 degrees. Mix together dry ingredients. Cut in shortening with a pastry fork. Add milk and combine with a fork. Knead gently if necessary. Roll dough to ¼ inch thickness and cut portions to cover soup mugs. 


I use the leftover dough for individual biscuits. Roll it a little thicker for puffy biscuits.


Assemble pies by filling soup mugs with chicken and vegetable mixture. Cover with biscuit dough and cut three slots to vent steam while baking. Press firmly around edges. Bake for 12 minutes.


Note: Substitute roast beef, beef bouillon, and beef gravy to make individual beef pot pies.If desired, double the filling ingredients to make one 8x8 pot pie. Vegetables can be adjusted as desired. If you don’t like corn, don’t use it!


Find more of my favorite recipes HERE.


Question: Do you have a recipe to share?  Comment below.

Running Granny Green encourages women, especially grandmothers, to gain greater fitness by providing tips and inspiration to insure long years of joyful grand-parenting. The cookie recipes are a bonus!


Happy Running!